> ## Content Index
> Fetch the complete content index at: https://reactpractice.dev/llms.txt
> Use this file to discover other available public pages before exploring further.
# Simple React and Vite setup with unit testing
- URL: https://reactpractice.dev/articles/simple-react-and-vite-setup-with-unit-testing/
- Published: 2024-05-18T13:40:49.000Z
- Updated: 2026-06-01T01:56:59.000Z
- Author: Corina Udrescu
- Tags: Articles, #corina-2, #Import 2026-06-09 12:07
The official React docs recommend using a framework with React, but sometimes you don't need all the bells and whistles that come with that.
Vite is the recommended alternative and it even provides a command line tool to scaffold a basic React project.
So why do you need a guide for this? While that setup gets you off the ground, it doesn't have any support for unit testing.
In this walkthrough we'll improve on the built-in Vite and React boilerplate to add support for vitest, React Testing Library and `msw` for mocking API requests.
If you just want to get coding, you can jump straight to the Github repository at [https://github.com/reactpractice-dev/basic-vite-react-boilerplate](https://github.com/reactpractice-dev/basic-vite-react-boilerplate?ref=reactpractice.dev).
### Step 1 - Create the Vite boilerplate
To get started, we'll use the [Vite command line tool](https://vitejs.dev/guide/?ref=reactpractice.dev#scaffolding-your-first-vite-project) to scaffold a React project:
```
npm create vite@latest
```
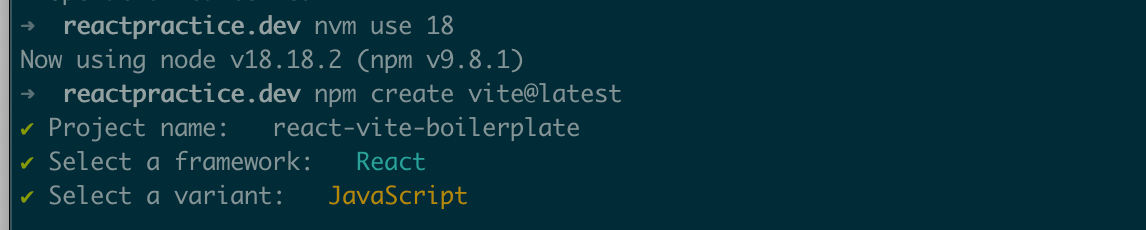
You can run `npm install` and `npm run dev` to check everything works as expected.
### Step 2 - Add Vitest and React Testing Library
I've found the best walkthrough on how to set this up is [the one written by Robin Wieruch](https://www.robinwieruch.de/vitest-react-testing-library/?ref=reactpractice.dev).
First, we'll install `vitest`, `jsdom` and React Testing Library:
```
npm install -D vitest
npm install -D @testing-library/react jsdom @testing-library/jest-dom @testing-library/user-event
```
Next, we'll need to update Vite configuration with a new `test` section, that describes the details on how to run the tests.
```
// vite.config.js
import { defineConfig } from "vite";
import react from "@vitejs/plugin-react";
export default defineConfig({
plugins: [react()],
test: {
// support `describe`, `test` etc. globally,
// so you don't need to import them every time
globals: true,
// run tests in jsdom environment
environment: "jsdom",
// global test setup
setupFiles: "./tests/setup.js",
},
});
```
Notice we're referencing a `setup.js` file as a global test setup - this is where we extend the `expects` statement with useful helpers from RTL (like `expect(...).toBeInTheDocument`) and make sure we cleanup after each test.
```
import { expect, afterEach } from "vitest";
import { cleanup } from "@testing-library/react";
import * as matchers from "@testing-library/jest-dom/matchers";
expect.extend(matchers);
afterEach(() => {
cleanup();
});
```
Then, we can add the `test` command to the `package.json` file, so we can run `npm run test` to run the test suite.
```
// package.json
...
"scripts": {
"dev": "vite",
"build": "vite build",
"lint": "eslint . --ext js,jsx --report-unused-disable-directives --max-warnings 0",
"preview": "vite preview",
"test": "vitest"
},
...
```
This is enough to get the tests to work, however you'll notice in your IDE that Eslint complains about the global `describe` and `it` statements in the test. To fix this, we need to enable the `vites-globals` Eslint plugin.
```
npm install -D eslint-plugin-vitest-globals
```
```
// .eslintrc.cjs
module.exports = {
root: true,
env: {
browser: true,
es2020: true,
"vitest-globals/env": true // <--- add new env
},
extends: [
"eslint:recommended",
"plugin:react/recommended",
"plugin:react/jsx-runtime",
"plugin:react-hooks/recommended",
"plugin:vitest-globals/recommended", // <---- add new plugin
],
ignorePatterns: ["dist", ".eslintrc.cjs"],
parserOptions: { ecmaVersion: "latest", sourceType: "module" },
```
### Step 3 - Add support for msw
msw is a library that allows mocking HTTP requests. This is very useful in tests, as it allows us to not call any backend directly, but instead use dummy responses, tailored to the specifics of the test.
To get a feeling of what we're trying to achieve, I created a simple `RandomQuote` component that loads a quote from [https://api.quotable.io/quotes/random](https://api.quotable.io/quotes/random?ref=reactpractice.dev) and displays it:
```
import { useEffect, useState } from "react";
const RandomQuote = () => {
const [quote, setQuote] = useState();
useEffect(() => {
fetch("https://api.quotable.io/quotes/random")
.then(function (response) {
return response.json();
})
.then(function (data) {
setQuote(data[0].content);
});
}, []);
return {quote}
;
};
export default RandomQuote;
```
A simple test for this component would look like this:
```
it("renders a quote", async () => {
render();
expect(
await screen.findByText(/If you accept the expectations of others/)
).toBeInTheDocument();
});
```
So how do we skip calling the backend in the test? By adding a `beforeEach` statement that mocks the backend call and returns a dummy response instead:
```
beforeEach(() => {
server.use(
http.get("https://api.quotable.io/quotes/random", () => {
return HttpResponse.json([
{
_id: "2i4ILvPHXsgJ",
content:
"If you accept the expectations of others, especially negative ones, then you never will change the outcome.",
author: "Michael Jordan",
tags: ["Change", "Wisdom"],
authorSlug: "michael-jordan",
length: 107,
dateAdded: "2019-08-16",
dateModified: "2023-04-14",
},
]);
})
);
});
```
This way, the test always returns the same data so we can assert for the exact quote we provided.
This way of testing is very useful, as we can also check for error responses, for edge cases with the data and so on. So let's get `msw` set up!
First step is to install it:
```
npm install -D msw msw/node
```
Then, we'll create a new file under the `tests` folder where we'll define our mock server:
```
// tests/mock-api-server.js
import { setupServer } from "msw/node";
const server = setupServer();
export default server;
```
Finally, we need to configure the mock server to listen for requests before every test by updating the global setup file:
```
// tests/setup.js
import { expect, afterEach } from "vitest";
import { cleanup } from "@testing-library/react";
import * as matchers from "@testing-library/jest-dom/matchers";
import server from "./mock-api-server";
expect.extend(matchers);
beforeAll(() => server.listen());
afterEach(() => {
server.resetHandlers();
cleanup();
});
afterAll(() => server.close());
```
And that's it - you can now use mocks in your tests!
### Conclusion
This is the most basic React and Vite setup that I keep coming back to. What about you? Is there anything else you usually include?
Share your thoughts in the comments below!
And if you want to use this setup in your own projects, here's the completed code on Github: [https://github.com/reactpractice-dev/basic-vite-react-boilerplate](https://github.com/reactpractice-dev/basic-vite-react-boilerplate?ref=reactpractice.dev)