7 min read

Tutorial: Build a Github repositories search page with sorting and pagination

The Github REST API provides an endpoint dedicated for searching repositories.
For example, for searching for all repositories with the word nextjs, we would send the following request:

GET https://api.github.com/search/repositories?q=nextjs

You can even paste this in your browser and you will see the sample JSON the endpoint returns.

To get started, let's fetch this info in a React component and display the list of repositories.
We will use React Query for fetching the data.

For scaffolding the app, we can use Vite with Typescript, and add Tailwind for styling (see step by step instructions).

Setting up the app

Before we fetch any data from Github, we should install and configure React Query.
To keep the code clean, let's also create an empty component for the GithubRepositorySearch.

npm install @tanstack/react-query

The updated App.tsx with the new config is this:

import { QueryClient, QueryClientProvider } from "@tanstack/react-query";
import GithubRepositorySearch from "./components/GithubRepositorySearch";

const queryClient = new QueryClient();

function App() {
  return (
    <QueryClientProvider client={queryClient}>
      <GithubRepositorySearch />
    </QueryClientProvider>
  );
}

export default App;

Fetching a sample list of repositories from Github

To fetch all repositories that contain the words nextjs using React Query, our GithubRepositorySearch would look as follows:

import { useQuery } from "@tanstack/react-query";

async function getRepositories() {
  const response = await fetch(
    "https://api.github.com/search/repositories?q=nextjs"
  );
  const data = await response.json();
  return data;
}

const GithubRepositorySearch = () => {
  const { isPending, error, data } = useQuery({
    queryKey: ["repository-search"],
    queryFn: getRepositories,
  });

  if (isPending) return "Loading...";

  if (error) return "An error has occurred: " + error.message;

  return (
    <ol>
      {data?.items.map((repo: { name: string }) => (
        <li>{repo.name}</li>
      ))}
    </ol>
  );
};

export default GithubRepositorySearch;

This is very basic, but we can see the repository names!

You'll notice after playing with this a bit that you'll get the rate limit error from Github.
This is because Github has a rate limit of 60 requests per hour for unauthenticated requests.

To work around this, you can get an API key and increase the limit to 5000 requests per hour, or - the option I chose - to simply use mock data during development, to skip calling the API in the first place:


import { useQuery } from "@tanstack/react-query";
import mockData from "../mock-data.json";

async function getRepositories() {
  return mockData;
  //   const response = await fetch(
  //     "https://api.github.com/search/repositories?q=nextjs"
  //   );
  //   const data = await response.json();
  //   return data;
}

The mock-data.json files contains the full JSON returned when calling https://api.github.com/search/repositories?q=nextjs (copied from the "Network" tab of the Chrome Developer Tools).

Displaying the repository details as cards

Now that we have fetched the repo information, we can show more than just the name for each - the description, labels, number of stars and date it was last updated.
To keep the code clean, let's create a RepositoryCard component that will show the repo details in a card view.
To format the last updated date, we can use dayjs.

Here is the updated list view:

The RepositoryCard is very straightforward:

import dayjs from "dayjs";

type GithubRepository = {
  full_name: string;
  html_url: string;
  description: string;
  stargazers_count: number;
  topics: string[];
  updated_at: string;
};

// e.g. "2025-03-08T02:32:22Z"
const formatDate = (date: string) => {
  return dayjs(date).format("D MMM YYYY");
};

const RepositoryCard: React.FC<{ repo: GithubRepository }> = ({ repo }) => {
  return (
    <div className="border border-gray-300 p-4 my-3 rounded">
      <a
        href={repo.html_url}
        className="text-blue-600 hover:underline text-lg mb-3"
      >
        {repo.full_name}
      </a>
      <p>{repo.description}</p>
      <div className="mt-2">
        {repo.topics.map((topic: string) => (
          <span className="bg-blue-100 mr-1 rounded text-blue-700 p-1 text-xs leading-7">
            {topic}
          </span>
        ))}
      </div>
      <div className="text-gray-500 text-xs flex gap-2 mt-2">
        <span>{repo.stargazers_count} stars</span>
        <span>·</span>
        <span>Updated on {formatDate(repo.updated_at)}</span>
      </div>
    </div>
  );
};

export default RepositoryCard;

Allowing the user to search by name

So far we hardcoded nextjs as the query term - but let's add an input to allow the user to search for any text.

We can add a form with the search input right below the page title:

<form onSubmit={handleSubmit}>
	<input
	  name="searchQuery"
	  type="text"
	  placeholder="Search repositories..."
	  className="w-full p-2 border border-gray-300 rounded mb-3 bg-gray-100"
	/>
</form>

Notice the input is uncontrolled - there are two reasons for this:

  • we want the search results to refresh only after the user types "Enter" (as opposed to after every keystroke)
  • we can read the searchQuery input value using the native FormData interface

Here is how this looks in practice:

const [searchQuery, setSearchQuery] = useState("");

const handleSubmit = (e: FormEvent<HTMLFormElement>) => {
    e.preventDefault();

    const formValues = new FormData(e.currentTarget);
    setSearchQuery(formValues.get("searchQuery") as string);
};

This way, we only update the searchQuery and trigger a rerender only after the user hits Enter (this submitting the form).

You can debug the form data using console.log(Array.from(formValues));

Next, let's update the useQuery hook.
Since we now have a parameter, we need to also update the queryKey to take it into consideration (since we need to have a unique key for the local cache).

On the initial page load, the searchQuery is empty, which is not a valid Github API request. To fix this, we set the enabled flag based on the searchQuery value - if empty, we don't even attempt to fetch.

Last, when there is no searchQuery, we should just default to an empty array.

  const { isPending, error, data } = useQuery({
    queryKey: ["repository-search", searchQuery],
    queryFn: () => getRepositories(searchQuery),
    enabled: searchQuery !== "",
    initialData: [],
  });

With this in place, our app now allows us to search by name:

Extracting the query to a custom hook

It's a good practice when using React Query to create custom hooks for the queries you are using. Thus, let's create a useSearchRepositories custom hook. We can add the code to fetch the data from Github and the Typescript type definition to the same file.

// api/useSearchRepositories.ts
import { useQuery } from "@tanstack/react-query";

export type GithubRepository = {
. id: string;
  full_name: string;
  html_url: string;
  description: string;
  stargazers_count: number;
  topics: string[];
  updated_at: string;
};

async function getRepositories(searchQuery: string) {
  const response = await fetch(
    `https://api.github.com/search/repositories?q=${searchQuery}`
  );
  const data = await response.json();
  return data;
}

function useSearchRepositories(searchQuery: string) {
  return useQuery<{ items: GithubRepository[] }>({
    queryKey: ["repository-search", searchQuery],
    queryFn: () => getRepositories(searchQuery),
    enabled: searchQuery !== "",
    initialData: { items: [] },
  });
}

export { useSearchRepositories };

Then, in App.tsx, we will simply call the custom hook:

  const [searchQuery, setSearchQuery] = useState("");
  const { isPending, error, data } = useSearchRepositories(searchQuery);

Notice we also extracted the GithubRepository type to this file. The RepositoryCard component was also updated to read the type from the new file.

Adding pagination

Next, let's allow the user to navigate to different pages of the search results.
The requirements stated we should show 10 repositories per page by default.

We can configure this using the per_page and page API parameters (see docs):

Since we will want to allow the user to configure the number of results per page, let's add both page and per_page as state variables:

// App.tsx
const [page, setPage] = useState(1);
const [perPage, setPerPage] = useState(10);

Then, we want to pass these values to our query. We can update the signature of useSearchRepositories to take an object of params:

  const { isPending, error, data } = useSearchRepositories({
    searchQuery,
    page,
    perPage,
  });

We can also define the type of these params in our custom hook file:

type SearchRepositoriesParams = {
  searchQuery: string;
  page: number;
  perPage: number;
};

Then, the updated API request and hook would be:

async function getRepositories(params: SearchRepositoriesParams) {
  const urlParams = new URLSearchParams({
    q: params.searchQuery,
    page: params.page.toString(),
    per_page: params.perPage.toString(),
  });
  const response = await fetch(
    `https://api.github.com/search/repositories?q=${urlParams}`
  );
  const data = await response.json();
  return data;
}

function useSearchRepositories(params: SearchRepositoriesParams) {
  return useQuery<{ items: GithubRepository[] }>({
    queryKey: ["repository-search", params],
    queryFn: () => getRepositories(params),
    enabled: params.searchQuery !== "",
    initialData: { items: [] },
  });
}

Notice the useQuery query key was updated to now include the full params object.
Also, when fetching the data, we now pass multiple parameters, so we used URLSearchParams Browser API to encode them (read more about passing query params in GET requests with fetch).

The requests are now in place, but nothing changed in the UI - the user can't actually navigate yet.

Let's create a new component - Pagination - where we can show the page numbers.
The API response also returns a total_count, so we can use that to compute the total number of pages.

Looking at the Github website, we can see they only show a max range of 10 pages for the user to pick from, so let's do that as well.


If the results have more than 100 pages, we don't show them - we stop at 100.

type Props = {
  currentPage: number;
  perPage: number;
  totalCount: number;
  onPageChange: (p: number) => void;
};

const Pagination: React.FC<Props> = ({
  currentPage,
  perPage,
  totalCount,
  onPageChange,
}) => {
  const numberOfPages = Math.ceil(totalCount / perPage);
  const allPages = Array.from({ length: numberOfPages }, (_, i) => i + 1);
  const visiblePages = [
    // first page
    allPages[0],
    // pages around the current page
    ...allPages.slice(Math.max(currentPage - 3, 1), currentPage + 2),
    // last page
    allPages[allPages.length - 1] > 100 ? 100 : allPages[allPages.length - 1],
  ];
  return (
    <ul className="flex gap-1 my-4 justify-center">
      {visiblePages.map((page, index) => (
        <li key={page}>
          <button
            onClick={() => onPageChange(page)}
            className={`cursor-pointer rounded-xl py-2 px-3 ${
              currentPage === page
                ? "font-bold bg-blue-600 text-white"
                : "hover:bg-gray-200"
            }`}
          >
            {page}
          </button>
          {visiblePages[index + 1] - page > 1 && <span>...</span>}
        </li>
      ))}
    </ul>
  );
};

export default Pagination;

Adding the settings for sorting

The sort and order parameters allow the user to specify what to sort by and whether the sorting should be ascending or descending.

These can be added just like we added the pages.

You can check out the full working solution over at https://github.com/reactpractice-dev/search-github-repositories.

Share your solution in the comments below!

Get the React Practice Calendar!

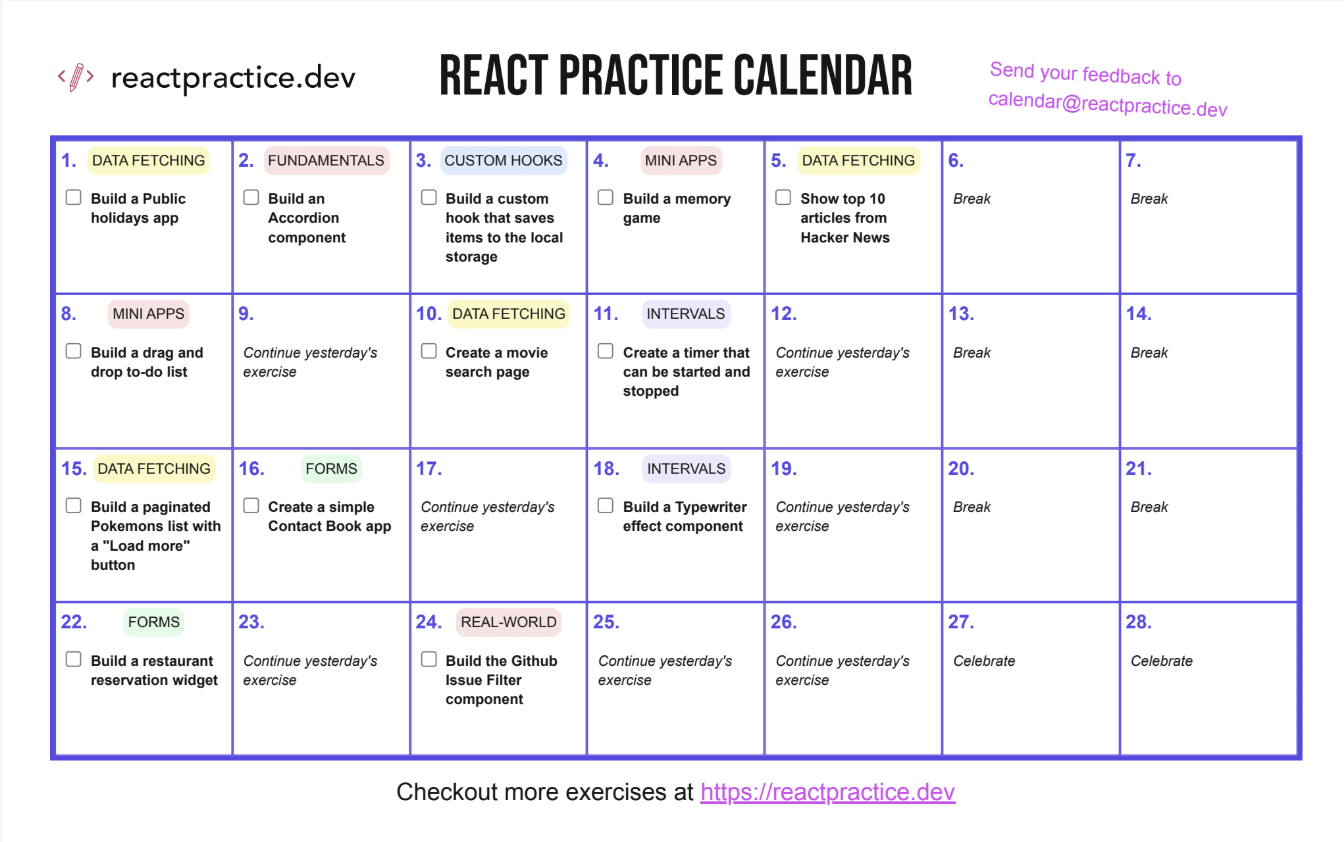
28 days of focused practice of increasing difficulty, going through everything from Fundamentals, Data fetching, Forms and using Intervals in React.

You will also get notified whenever a new challenge is published.