Tutorial: How to build a Notes app with React Query
If you haven't already, try to solve it yourself first before reading the solution!
The exercise description suggested a component structure we can use, so we can follow along with the unit tests. Let's use that!
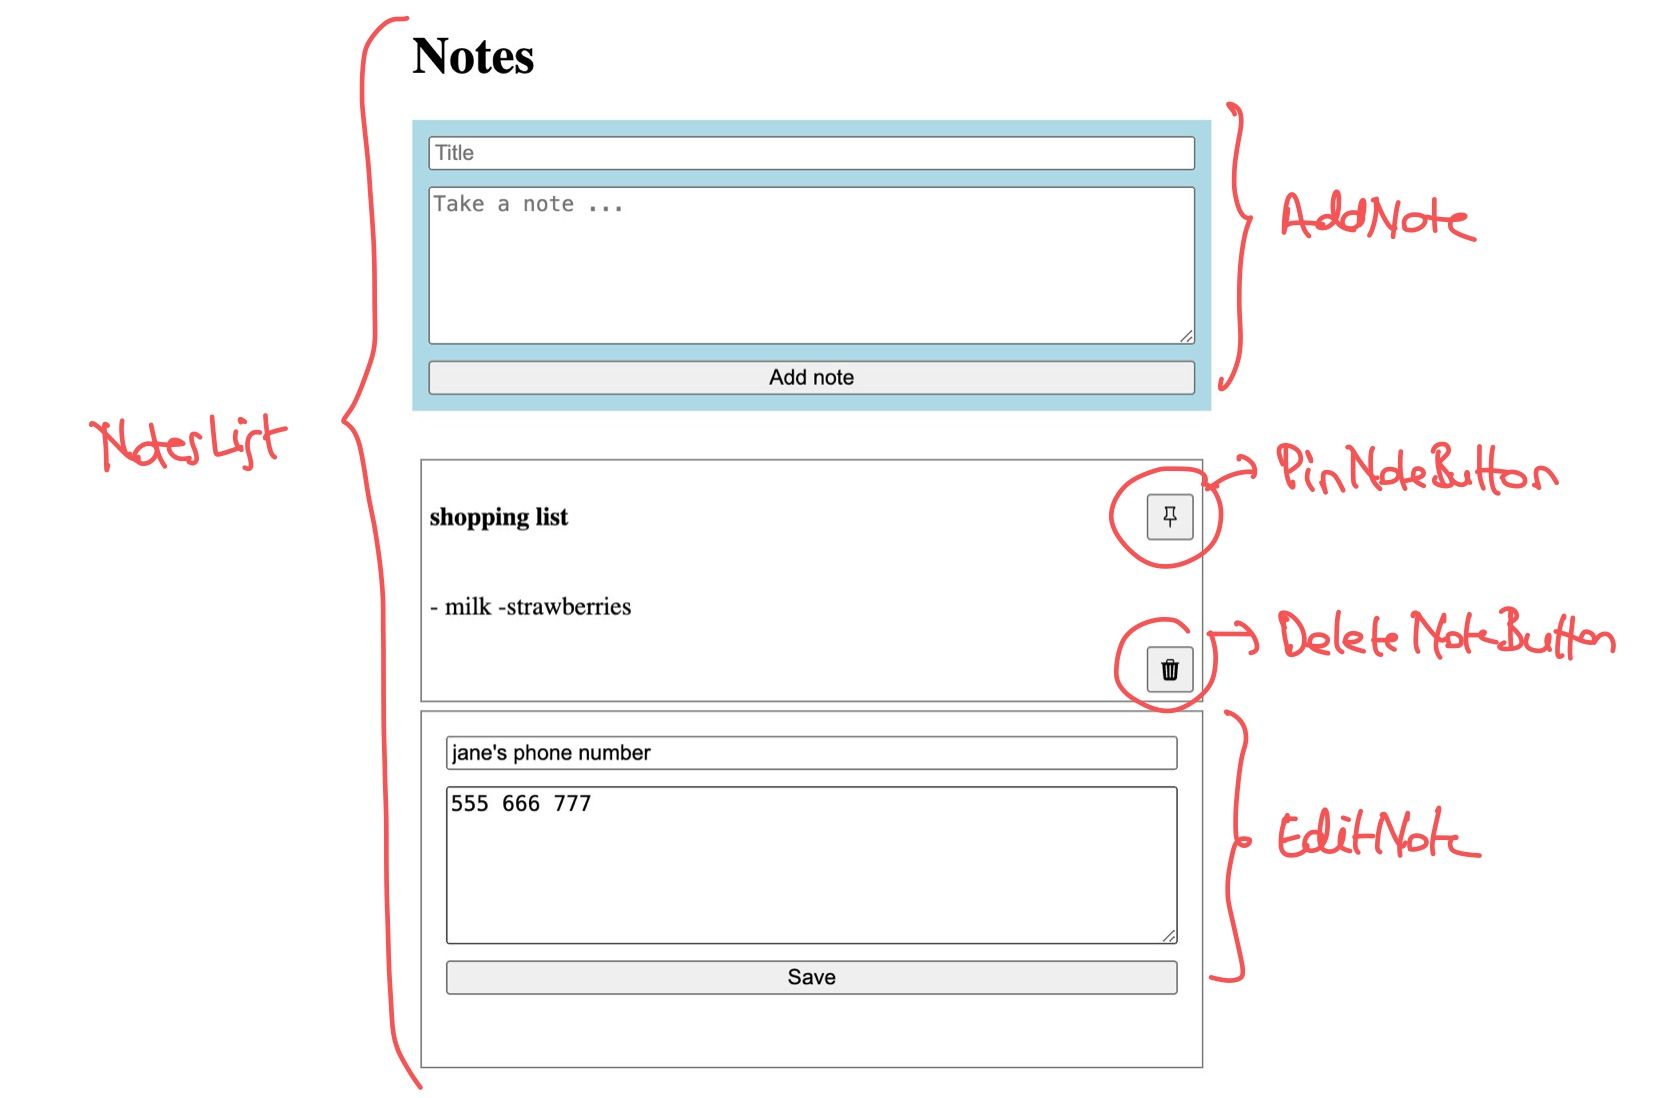
I suggest we build the functionality in the following order - you don't have to, but this is the way I usually build CRUD interfaces:
- showing the list of available notes
- adding a note
- deleting a note
- editing a note
- pinning a note
Before you start, make sure you run npm run backend-server to get the backend endpoints up and running.
Showing the list of available notes
Let's start by running the tests for NotesList: : npm run test NotesList
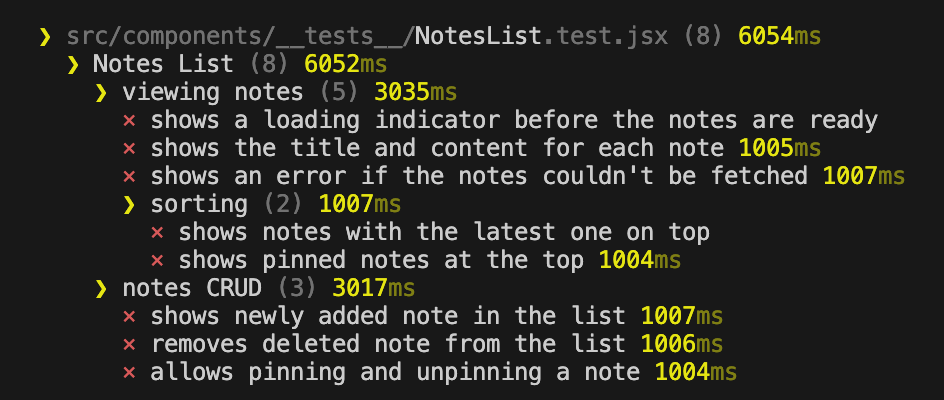
We want to focus on just viewing the notes for now, so it helps to only run the "viewing notes" test group. To do this, we can replace describe('viewing notes') with describe.only('viewing notes') so vitest runs just that group (tip: you can also run just one test by adding .only to it(..) statements).
Inspecting the backend
Next, let's implement the actual component. It helps to first inspect the backend endpoint to check the structure of the data.
If you haven't already, run npm run backend-server to start the json server serving the notes. This will start a server running at http://localhost:3000.
To inspect the notes endpoint, the simples way is to type the path in the browser:
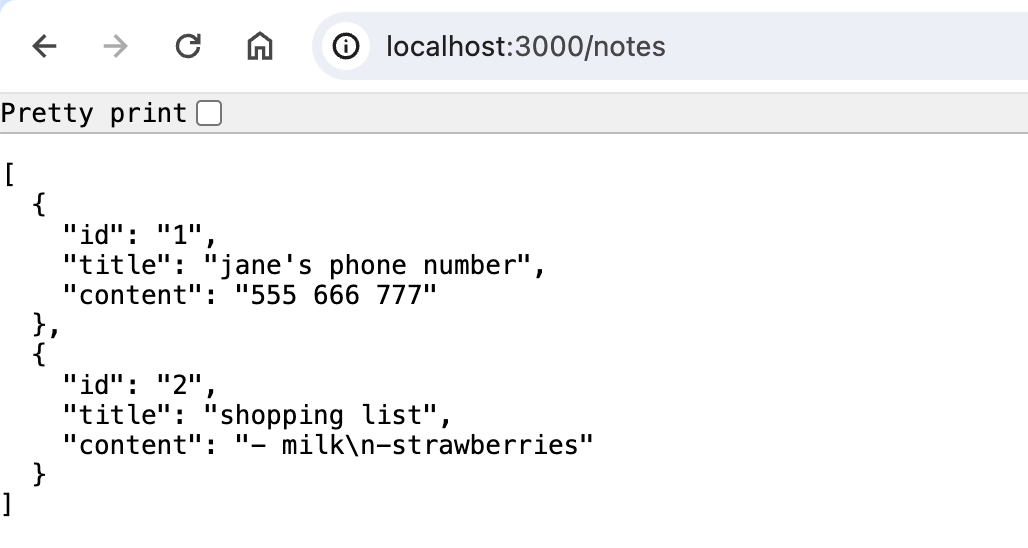
Looks like the backend already starts with a few notes - this is what we can use to display the initial note list.
Fetching the data
To load the data in our app, I chose to use axios, as it has better handling of errors and we can just rely on it to throw if the data couldn't be fetched (as opposed to fetch, which for example doesn't throw for 401 HTTP errors)
// install the library
npm install axios

// example of using it to get the notes
axios.get("http://localhost:3000/notes")
  .then((response) => console.log(response.data)}
  .catch((e) => console.log(e.message))
Configuring React Query
We want to fetch the list using React Query. For this, we need to first install it and configure it - we can just follow the docs.
npm install @tanstack/react-query
Then, in App.jsx we can setup the Query Client and add the provider:
// App.jsx
import { QueryClient, QueryClientProvider } from "@tanstack/react-query";
import NotesList from "./components/NotesList";

function App() {
  const queryClient = new QueryClient();
  return (
    <QueryClientProvider client={queryClient}>
      <NotesList />
    </QueryClientProvider>
  );
}

export default App;
Now we're ready to use React Query in our component.
The NotesList component
We can use the useQuery hook from React Query to load the notes.
To render the notes, we need to follow the HTML markup recommended in the exercise description, so the tests will pass: the list should be rendered as an ul, with each note being wrapped in an li element.
Here is how our component will look:
import { useQuery } from "@tanstack/react-query";
import axios from "axios";

const NotesList = () => {
  const {
    isLoading,
    error,
    data: notes,
  } = useQuery({
    queryKey: ["notes"],
    queryFn: () =>
      axios
        .get("http://localhost:3000/notes")
        .then((response) => response.data),
  });

  if (isLoading) {
    return "Loading ...";
  }

  if (error) {
    return `There was an error fetching the notes ${error}`;
  }

  return (
    <div>
      <h1>Notes</h1>
      <ul>
        {notes.map((note) => (
          <li key={note.id}>
            <h3>{note.title}</h3>
            <p>{note.content}</p>
          </li>
        ))}
      </ul>
    </div>
  );
};

export default NotesList;
And sure enough, the tests for viewing the notes now pass! But there are still some failing - related to sorting; let's continue over to those next.
Sorting the notes
We need to sort the notes based on two things:
- showing the latest ones on top
- showing the pinned notes first, regardless of when they were created
The instructions mentioned that we can assume the API endpoint always returns the notes in chronological order. Thus, an easy way to sort is to just reverse the notes.
We can do this using the reverse Javascript method - and since it mutates, we need to create a copy of the notes first:
const reversedNotes = [...notes.reverse()]
Then, to show the pinned ones on top, we can split the notes in two groups, and show the "pinned" group first.
const sortedNotes = [
    ...reversedNotes.filter((n) => n.is_pinned),
    ...reversedNotes.filter((n) => !n.is_pinned),
  ];
We can then use this sortedNotes in place of notes when rendering, and the tests for sorting will also pass.
Styling
Styling is out of the scope of this exercise - so we can keep things focused on React Query. However, to make the UI a little bit like Google Keep, you can add the following styles to the NotesList:
<div style={{ maxWidth: "500px", margin: "auto" }}>
  <h1>Notes</h1>
  ...
  <ul style={{ listStyleType: "none", paddingLeft: 0 }}>
	{sortedNotes.map((note) => (
	  <li
		key={note.id}
		style={{
		  border: "1px solid gray",
		  padding: "5px",
		  margin: "5px",
		}}
>
		...
	  </li>
	))}
  </ul>
</div>
Adding a note
To add a note, we will use the POST /notes endpoint, that accepts a JSON with the title and content of the note. We can call this using React Query's useMutation hook. Here's an example:
const addNoteMutation = useMutation({
    mutationFn: (newNote) => axios.post("http://localhost:3000/notes", newNote),
});

addNoteMutation.mutate({
      title: "test",
      content: "just showing how this works",
    },
	{
	  onSuccess: () => {
		console.log("yuhuu");
	  },
	});
Let's run the tests and start coding the component.

Form for adding a note
First, we'll create a form, using a text input for the title and a textarea for the content. To make sure the tests can find the form elements, we should add aria-label attributes to each ("Title" and "Content" respectively).
<input type="text" placeholder="Title" aria-label="Title" />
<textarea placeholder="Take a note ..." aria-label="Content" />
The submit button will be disabled when the mutation is in progress and we can also update the label to say "Adding note" instead of "Add note":
<button type="submit" disabled={addNoteMutation.isPending}>
   {addNoteMutation.isPending ? "Adding note" : "Add note"}
</button>
Note we're using isPending instead of isLoading - this is a recent change that React Query did in the latest version (v5).
Submitting the new note
To read the form values, we can turn the form fields into "controlled" elements. This way, we can store their values in React state and pass them to the backend when creating the note:
const [title, setTitle] = useState("");
const [content, setContent] = useState("");
...

<input
	type="text"
	placeholder="Title"
	aria-label="Title"
	value={title}
	onChange={(e) => setTitle(e.target.value)}
  />
<textarea
	placeholder="Take a note ..."
	aria-label="Content"
	value={content}
	onChange={(e) => setContent(e.target.value)}
  />
With the values in place, we can add the submit handler:
 const handleSubmit = (e) => {
    e.preventDefault();
    addNoteMutation.mutate(
      { title, content },
      {
        onSuccess: () => {
          console.log('yaay')
        },
      }
    );
  return (
    <form onSubmit={handleSubmit}>
      ....
    </form>
To check that everything works until now, we can include AddNote inside the NotesList component and try out the form.
You can add the following style to the form attribute, to make the form look a bit better:
style={{
	display: "flex",
	flexDirection: "column",
	gap: "10px",
	padding: "10px",
	backgroundColor: "lightblue",
	marginBottom: "30px",
  }}
The form looks like it's working, but there are two things missing:
- the main list doesn't update
- the form fields don't get cleared after submit
For the first point, the issue is that we don't clear the React Query cache. To do that, a common pattern is to invalidate the whole notes cache:
const queryClient = useQueryClient();
...
  onSuccess: () => {
      queryClient.invalidateQueries({ queryKey: ["notes"] });
  },
As for the form fields not being cleared, fixing it is as simple as resetting the state for title and content:
onSuccess: () => {
	  ...
	  setTitle("");
	  setContent("");
	},
User feedback - "toast" messages
The note now gets created, but there's no indication to the user whether it was completed successfully or not.
A common way to notify the user is with a "toast" component:
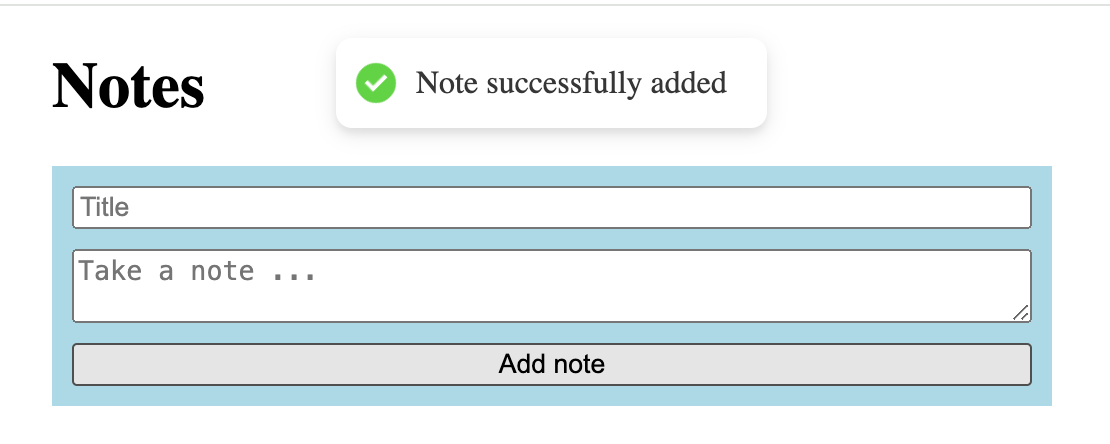
Let's add one ourselves using the react-hot-toast npm library.
// install the library
npm install react-hot-toast
// example of how to use the toast
toast.success("Note successfully added");
First, we need to update App.jsx to setup the global location where the toast will show up - in our case, just above the NotesList:
...
import { Toaster } from "react-hot-toast";

function App() {
  const queryClient = new QueryClient();
  return (
    <QueryClientProvider client={queryClient}>
      <Toaster />
      <NotesList />
    </QueryClientProvider>
  );
}

export default App;
Then, we can call it in the onSuccess handler of the mutation. The completed submit handler is as follows:
  const handleSubmit = (e) => {
    e.preventDefault();

    addNoteMutation.mutate(
      { title, content },
      {
        onSuccess: () => {
          queryClient.invalidateQueries({ queryKey: ["notes"] });
          setTitle("");
          setContent("");
          toast.success("Note successfully added");
        },
      }
    );
  };
Error handling
Last but not least, let's show an error if the note couldn't be saved.
This could be due to client side validation errors (for example, neither title nor content being filled in), or due to a server error (for example, server being down).
We can keep track of both with a state variable:
const [error, setError] = useState(null);

...

const handleSubmit = (e) => {
    e.preventDefault();

    if (!title || !content) {
      setError("You need to fill in at least one of the title and content");
      return;
    }

    addNoteMutation.mutate(
      { title, content },
      {
        onSuccess: () => { ... },
        onError: (err) => {
          setError(err.response.statusText);
          toast.error("There was an error adding the note");
        },
      }
    );
};

return (
    <form
      onSubmit={handleSubmit}
    >
      {error && <span style={{ color: "red" }}>{error}</span>}
      ...
    </form>
And with that, the AddNote test is now fully passing.
Deleting a note
With all the React Query and Toast pieces in place, deleting a note will be rather straightforward.
Here is the completed component - it uses the useMutation hook, cache invalidation and toast messages, just like the AddNote component:
import axios from "axios";
import toast from "react-hot-toast";
import { useMutation, useQueryClient } from "@tanstack/react-query";

const DeleteNoteButton = ({ id }) => {
  const queryClient = useQueryClient();
  const deleteNoteMutation = useMutation({
    mutationFn: (noteId) =>
      axios.delete(`http://localhost:3000/notes/${noteId}`),
  });
  const handleDeleteNote = () => {
    deleteNoteMutation.mutate(id, {
      onSuccess: () => {
        queryClient.invalidateQueries({ queryKey: ["notes"] });
        toast.success("Note successfully deleted");
      },
      onError: () => {
        toast.error("There was an error deleting the note");
      },
    });
  };

  return (
    <button
      onClick={handleDeleteNote}
      title={deleteNoteMutation.isPending ? "Deleting note" : "Delete note"}
      disabled={deleteNoteMutation.isPending}
    >
      {deleteNoteMutation.isPending ? "Deleting note" : "Delete note"}
    </button>
  );
};

export default DeleteNoteButton;
As a nice touch, we can use a "trash can" icon for the Delete button, instead of a text label. For this, install the react-icons package with npm install react-icons;
Then we can use the Bootstrap trash icon as the button label:
import { BsFillTrash3Fill } from "react-icons/bs";
...

  return (
    <button ...>
      <BsFillTrash3Fill />
    </button>
  );
...
Editing a note
To edit a note, we want to show the title and content as editable fields.
The note should become editable when clicking on it.
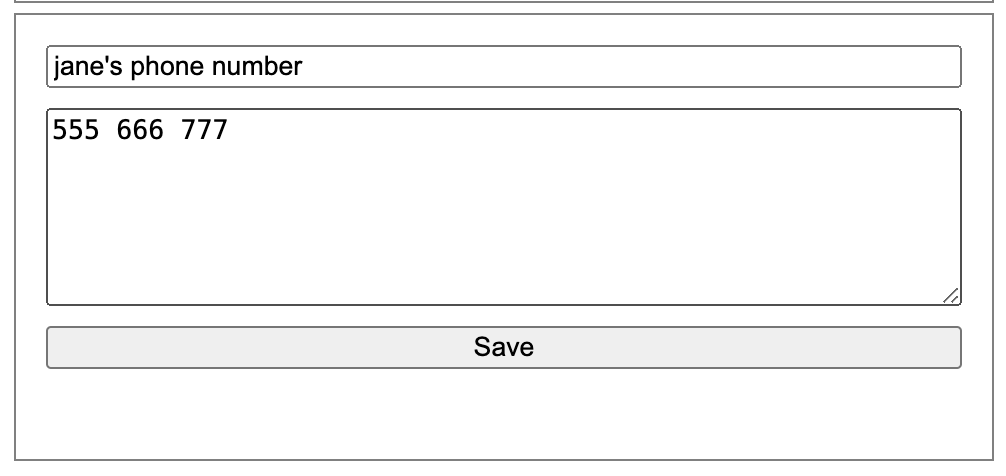
The EditForm component itself is very similar to AddNote, so we can just jump to the completed component. Notice the form fields, submit handler and user feedback, as before.
import { useState } from "react";
import axios from "axios";
import { useMutation, useQueryClient } from "@tanstack/react-query";
import toast from "react-hot-toast";

const EditNote = ({ note, onSave }) => {
  const [title, setTitle] = useState(note.title);
  const [content, setContent] = useState(note.content);

  const editNoteMutation = useMutation({
    mutationFn: (updatedNote) =>
      axios.put(`http://localhost:3000/notes/${note.id}`, updatedNote),
  });
  const queryClient = useQueryClient();

  const handleSubmit = (e) => {
    e.preventDefault();

    editNoteMutation.mutate(
      { ...note, title, content },
      {
        onSuccess: () => {
          queryClient.invalidateQueries({ queryKey: ["notes"] });
          toast.success("Note successfully saved");
          onSave();
        },
        onError: () => {
          toast.error("There was an error saving the note");
        },
      }
    );
  };

  return (
    <form onSubmit={handleSubmit}>
      <input
        type="text"
        aria-label="Title"
        value={title}
        onChange={(e) => setTitle(e.target.value)}
      />
      <textarea
        aria-label="Content"
        value={content}
        onChange={(e) => setContent(e.target.value)}
      />
      <button type="submit" disabled={editNoteMutation.isPending}>
        {editNoteMutation.isPending ? "Saving ..." : "Save"}
      </button>
    </form>
  );
};

export default EditNote;
What is worth going over is how to make a note editable on click.
We can track whether a note has been clicked and is "editable" with a state variable in NotesList:
  const [noteBeingEdited, setNoteBeingEdited] = useState(null);

  return (
      <ul ...>
        {sortedNotes.map((note) => (
          <li key={note.id}>
            {noteBeingEdited === note.id ? (
              <EditNote note={note} onSave={() => setNoteBeingEdited(null)} />
            ) : (
              <div onClick={() => setNoteBeingEdited(note.id)}>
                <h3>{note.title}</h3>
                <div>
                  <p>{note.content}</p>
                  <DeleteNoteButton id={note.id} />
                </div>
              </div>
            )}
          </li>
        ))}
      </ul>
    </div>
  );
};

export default NotesList;
This way, users can only edit one note at a time.
Notice the onSave callback on the EditNote component - this allows us to "unset" the Edit mode once the changes are saved.
(If you're watching this closely you'll notice there's no way to cancel the edit - this was indeed skipped to prevent the scope from getting too big).
If you'll try this out, you'll notice clicking the "Delete" button also switched to Edit mode! This is not expected, so let's stop the "click" event from bubbling upwards on the Delete button:
// DeleteNoteButton.jsx
const handleDeleteNote = (e) => {
	e.stopPropagation();

    deleteNoteMutation.mutate(id,  ...);
  };
Pinning a note
Lastly, let's add the "Pin" button. We can use the HTTP PATCH method of the /notes endpoint. The completed component is below:
import axios from "axios";
import toast from "react-hot-toast";
import { useMutation, useQueryClient } from "@tanstack/react-query";
import { BsPin } from "react-icons/bs";
import { BsPinFill } from "react-icons/bs";

const PinNoteButton = ({ id, is_pinned }) => {
  const queryClient = useQueryClient();
  const pinNoteMutation = useMutation({
    mutationFn: (patchedNote) =>
      axios.patch(`http://localhost:3000/notes/${patchedNote.id}`, patchedNote),
  });
  const handleDeleteNote = (e) => {
    e.stopPropagation();

    pinNoteMutation.mutate(
      { id, is_pinned: !is_pinned },
      {
        onSuccess: () => {
          queryClient.invalidateQueries({ queryKey: ["notes"] });
          toast.success("Note successfully pinned");
        },
        onError: () => {
          toast.error("There was an error pinning the note");
        },
      }
    );
  };

  return (
    <button
      onClick={handleDeleteNote}
      title={is_pinned ? "Unpin note" : "Pin note"}
      disabled={pinNoteMutation.isPending}
    >
      {is_pinned ? <BsPinFill /> : <BsPin />}
    </button>
  );
};

export default PinNoteButton;
Bonus: API folder structure
Throughout the exercise, we just called the backend endpoint inline and defined the useMutation hooks ad-hoc. In a real world app however, you wouldn't have this.
The best practice is to move them to an api folder, to keep the code reusable and readable.
I particularly liked the structure used by the Bulletproof React boilerplate, of having one file per API endpoint, with the axios call and hook colocated.
You can check out the final completed app over at https://github.com/reactpractice-dev/notes-app-react-query/tree/solution (the "solution" branch of the main repo).
I hope you enjoyed this tutorial!
Share a link to your solution in the comments below! Also, don't hesitate to reach out if you have any questions.
Happy coding!
Member discussion